0
£0.00

If your taps are dripping constantly, even when they haven't recently been used, you may need to replace your tap washer. A worn out washer is the most common reason for a leaking tap and can be easily replaced as long you have the right tools and you're willing to try. Before you approach actually taking your taps apart, it's worth familiarising yourself with the components of your tap and the process of how to change a tap washer.
There are two main parts of your tap that influence the flow of water. The first of these is the “seat”, a fixed part that water passes through and the “washer”, which controls flow when the tap's handle is turned, by being moved closer to or further away from the seat. As the space between the washer and tap grows, water is able to flow more freely. Conversely, when the washer is pressed against the seat, it should be able to contain the pressure and prevent water escaping from the tap.
In time, the constant water pressure and flow can erode the washer, wearing it away in some areas. This erosion means the washer will no longer make the tap watertight when it's pressed against the seat. Instead, pressure forces water through the gap and out of the tap's spout. This results in a leaking tap and the annoying drip that accompanies it. If you spot a leaky tap, a washer replacement is the simplest solution and the one likeliest to fix your problem.
Before starting, remember that every tap design is different and some units will require different methods to replace their washers. There are general guidelines for washer replacement but you should check your individual tap (ideally maintenance instructions too, if you can find them on the manufacturer's website). If you aren't confident about replacing any part of your plumbing, it might be worth hiring a professional instead.
Your first priority should be to protect your bathroom. Placing a protective covering over your ceramics, whether it's a bath or a wash basin, will help you prevent damage to the unit if anything unfortunate should occur, such as a part of your tap falling on it. This can be as simple as placing a towel in the basin to protect it. It's also worth covering your wastes before starting, to prevent losing small parts such as screws.
Next, and perhaps most importantly, you need to shut off the water supply to the tap you're working on. Modern plumbing systems will usually have an isolating valve on the pipe below the tap, allowing you to replace the washer without having to close off the entire water system. If you don't have an isolating valve, you'll need to turn off the mains water supply. If your taps are still running after turning off the mains, you'll need to turn on a tap downstairs and empty the residual water already in your system. If you don't properly shut off your system before removing your washer, you can end up with more than a dripping tap to worry about.
Now you'll need to remove the tap head to access the inner workings of the tap. A flat-headed screwdriver can be used to carefully pop out the top of the tap (usually a small piece that says “Hot” or “Cold”, letting you reach the main screw that holds the tap head in place. When you remove this screw, you should be able to take off the tap head and access the valve. You can then use a spanner to undo the valve and remove it. If you find this difficult, you can use a Stillson wrench (also known as a jaw or pipe wrench) to grip the tap spout.
After removing the tap valve, the washer should finally be visible. It will usually be held in place with a nut or screw, so it's a simple matter of loosening this and removing the old washer. Make sure your new washer is the same size as the original; placing the wrong size washer in your tap will usually result in a far more severe leak than the original problem.
Reassembling your tap should be relatively simple matter of reversing the disassembly process. If your old washer was held in place with a screw or nut, either put it back in its place or replace it with a new equivalent piece. Now return the valve to its place and tighten it with a spanner. There should be need to do this too tightly because of the valve's rubber seal, so don't tighten it too much or you may struggle to turn your tap on and off. Now reattach the tap head and cap it off by returning the top to its spot.
Now it should be safe to turn on the water supply to your tap, whether it's an isolating valve or the mains supply. It's advisable to place a towel or something else over the tap when first turning the water on, in case your handiwork isn't quite as watertight as you intended. Once your water supply is active again, test your taps and make sure they're easy to turn on and off. Hopefully, your tap should no longer be leaking and you'll be able to use it for many more years to come.
If your tap is still leaking after replacing the washer, there's a good chance that it's caused by erosion within the body of the tap itself. In this case, your best option might be to replace the tap entirely. In general, modern taps with ceramic discs are longer lasting than taps which exclusively use traditional metal washers. This is due to the material used and the relatively small amount of movement within the tap, limiting erosion. Usually, the inner workings of ceramic disc taps last as long as the body of the tap itself.

Hard water regions across the UK leave dense calcium carbonate deposits that block shower head nozzles and severely restrict water flow. Removing this limescale safely relies on mild acidity, rather than the aggressive scrubbing or heavy chemicals that permanently ruin bathroom fittings.
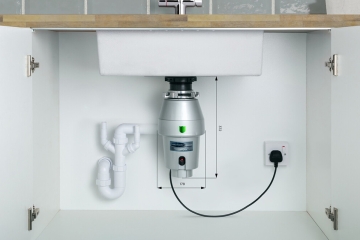
Food waste disposal units offer a highly hygienic method for managing kitchen scraps directly at the sink. These discreet under-sink appliances reduce household landfill contributions while eliminating odours and pests from the kitchen environment.

Upgrading to a rimless toilet eliminates hidden limescale and extends ceramic glaze lifespan by removing the need for abrasive bleach. Modern direct-flush mechanisms solve early splashing issues through horizontal water projection. However, retrofitting these pans to high-pressure concealed cisterns mandates a flow restrictor to perfectly calibrate flush volume.

By signing up I agree to receive HeatandPlumb.com emails and to the privacy policy. I can also unsubscribe at any time