0
£0.00

Grout is an essential part of any tiled bathroom, binding your tiles together and keeping your room watertight. Over time, constant use and exposure to dirt and moisture can leave your tiles cracked and discoloured. While proper care and regular cleaning will keep your grout beautiful for many years, old grout will eventually need replacing. If you're wondering how to replace old tile grout, it's a simple process but one that needs to be undertaken with care.
Before you consider how to replace your tile grout, it's important to ask yourself whether doing so is absolutely necessary. Replacing grout is unavoidably time consuming and messy, even with the proper tools, so it's always better to simply give your tiles a good clean if possible. Even the dirtiest grout can often be restored to its former glory with a little time and effort.
There are a number of household cleaners available that will clean up your grout, either specific grout cleaners or other products that will perform the same function, such as bleach and baking soda. While these products are unlikely to perfectly restore older grout to its initial whiteness, the end result can still be a vast improvement on what you start with. Whether or not cleaned grout is sufficient for you will largely depend on personal preference. An upcoming trend is completely replacing tiles with shower wall panels, that are easy to install and maintain.
If your grout is mouldy, it's important to take some time to investigate the cause. You don't want to go through the effort of replacing your grout only to face the same problem again in a few months' time. Mould can be caused by damp, lack of proper ventilation or water creeping behind your tiles in areas where your bathroom isn't watertight. By addressing the reason for your grout getting dirty and mould growth, you can be confident that your new grout will stay beautiful for longer.
If you've tried cleaning your grout with no success, or it's simply too old and cracked to keep, it's simple to replace but requires care to avoid damaging your tiles. The main reason for replacing older grout will usually be dirt or cracks, which can be remedied by replacing the upper layer. The process of removing existing grout is known as “raking” and is best achieved through the use of a grout rake. Grout rakes are usually inexpensive and simple to use, consisting of a carbide blade attached to a handle. Selecting a size of blade that matches the gap between your tiles will make your job much easier. Most grout rakes feature replaceable blades so it's worth buying a few spares; you don't want to break your only blade halfway through removing grout. Certain rakes will even allow you to fit two blades at the same time, ideal for quickly scraping out wide areas of grout, which can otherwise pose a challenge.
If you're planning on regrouting an entire room, it can be far quicker and less strenuous using an electrical tool but this does demand a great deal more care to avoid damaging your tiles. There are grout rakes designed for use many of the leading multi tools, making them a natural choice if you already possess a multi tool. If the amount of work still seems overwhelming or you aren't confident in removing the grout without doing damage, you're probably better off hiring a professional.
To properly replace your existing grout, you'll need to scrape away to a depth of at least 2mm and ideally more. This is to ensure that your new layer of grout stays between your tiles after it dries. It isn't really important to remove grout in any particular order but it usually helps to start in one corner of the room and work your way around. This is the easiest way to avoid missing anywhere and helps you have a sense of your progress. You'll need to push the rake blade quite hard into the grouted joint to start the removal process but it'll get easier once you've started. Take care to avoid digging into your tiles; the falling grout should be white, brown powder is usually a sure sign that you're damaging your tiles, wall or floor. You can always test the process with a hidden area before moving onto a more visible part of your room, to ensure you get it right.
It's important to make sure that there aren't any lumps left of the original grout, as this can prevent the replacement sticking properly and result in an unsightly, bumpy appearance. The easiest way to clean the area between the tiles is with a small, stiff nylon brush. Brush the gap, removing any residue, then use your vacuum cleaner to get the last of the powder and dust. You should be left with a smooth, clean area, ready for your new grout.
Placing your new grout should be the easiest and least time consuming part of the process. It's a simple matter of matching your mix to the existing colour of grout in the room, then applying the grout with a margin float. If you aren't feeling confident about your mix or how to apply grout properly, there are plenty of online videos that will demonstrate the proper technique. As long as you've removed enough of the older grout, the new mix should bind in the gaps. Wait for the grout to dry, this will usually take at least ten minutes but can vary depending on your room temperature and humidity. Then it's a simple matter of taking a damp sponge and wiping away the residue from your tiles. This should leave you with beautifully refreshed grout and a stunning tile area.

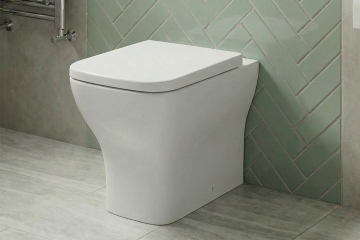
Toilet dimensions vary more than many homeowners expect, and a difference of just 50mm can dictate whether a pan fits comfortably or makes a small bathroom feel cramped. Comparing exact heights, widths and projection measurements before committing to a design prevents awkward layouts and costly installation compromises.
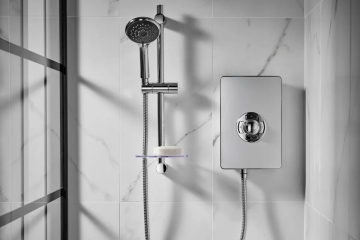
Running costs for an electric shower depend directly on its kilowatt (kW) rating and the current price of electricity. Higher-rated units heat water faster to provide better flow rates, but they inevitably draw more power to do so.
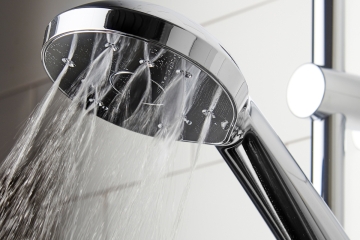
Hard water regions across the UK leave dense calcium carbonate deposits that block shower head nozzles and severely restrict water flow. Removing this limescale safely relies on mild acidity, rather than the aggressive scrubbing or heavy chemicals that permanently ruin bathroom fittings.

By signing up I agree to receive HeatandPlumb.com emails and to the privacy policy. I can also unsubscribe at any time