
0
£0.00
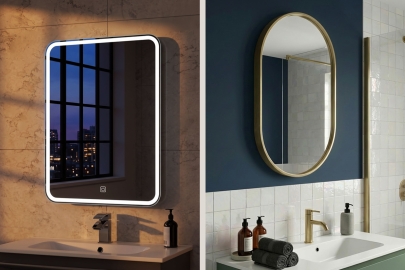
Two things decide how a bathroom mirror installation goes: the height it's hung at, and whether the fixings suit both its weight and the wall behind it. Height is a matter of measuring and checking. Fixings are where jobs tend to go wrong, because a plug that holds well in solid brick can be useless in a stud partition, and a tiled surface tells you nothing about what's supporting it.
The method also depends on the mirror. Some hang on brackets or a hanging plate, some are screwed through the frame or held by clips, a few are made for adhesive, and illuminated models bring an electrical connection into the picture.
In short: put the centre of the mirror at roughly eye level for the person who uses it most, choose fixings for your wall type and the mirror's weight, and leave any fixed electrical connection to an electrician. If you haven't picked a mirror yet, our [bathroom mirrors category - link] covers size and style. This guide starts once it's in the box.
No single height works for every bathroom. It depends on the size of the mirror, how tall the basin and taps are, and who uses it every day. A 500 mm round mirror over a pedestal basin sits in a different place from a 1,000 mm tall rectangle over a vanity unit with a tall mixer tap.
If you want a number to start from, the centre of the mirror at around 145 to 165 cm from the floor is a commonly quoted range, which is roughly eye level for an average adult standing at the basin. Treat it as a guideline rather than a fixed standard. Someone who is 1.55 m tall will want the mirror in a different place from someone who is 1.90 m.
Here's how to work out where yours should go:
Mark the proposed position lightly before you drill anything. Masking tape works well on tiles and painted walls, and pencil is fine on bare plaster. Put tape at the top, bottom and sides, then step back and check it from where you'd normally stand at the basin. For a large or heavy mirror, mark the bracket positions as well and leave room above for lifting, since many bracket systems involve raising the mirror above its final position before lowering it into place.
For a standard mirror with no electrical connection, usually yes, provided the wall is sound, you have fixings that suit it and you can lift the mirror safely. Most of the skill is in marking accurately and drilling carefully, not in anything specialist.
Professional help makes sense when:
Glass is heavier than it looks, and a large mirror is awkward to hold level while someone else lines up brackets. If it's big or heavy, get a second person for the lift and positioning. Handing the job to a fitter is a sensible call if any of the points above apply and you're unsure.
The right fixing depends on what's behind the surface you're drilling into, and on the weight of the mirror. Check the wall first, then choose the fixing. The table covers the four most common situations.
| Wall construction or finish | What to check | Fixing approach |
|---|---|---|
| Solid brick or block | Whether it's genuinely solid. Hollow or lightweight blocks, soft old brick and crumbly mortar all hold fixings differently. Plaster and any tile layer add depth. | Masonry plugs or frame fixings rated for that material and the mirror's weight, drilled with a masonry bit at the diameter and depth the fixing specifies. |
| Plasterboard on a stud wall | Where the timber or metal studs run, how thick the board is, and what's in the cavity (cables, pipes). | For a heavy mirror, fix into the framing where you can, or add support behind the board. Plasterboard anchors suit some lighter mirrors, but check each anchor's rated load for your board. Not every plasterboard fixing will hold a heavy mirror. |
| Dot-and-dab plasterboard | The board is stuck to masonry with adhesive dabs, so there are voids behind it. The gap varies, so check the maximum gap the fixing is made for. | Fixings made for dot-and-dab or drylined walls, which bridge the gap and anchor in the masonry behind. A short ordinary wall plug may only grip the board and can pull it into the void. |
| Tiled walls | What the tiles are fixed to (plasterboard, backer board or masonry), whether they're ceramic or porcelain, and whether any sound hollow. | Choose the fixing for the substrate behind the tile, using the matching row above, and allow for the thickness of the tile and adhesive. Drill the tile itself with a suitable tile bit first. |
Not sure what you've got? Tapping the wall can give you a clue, but it isn't conclusive, because stud walls and dot-and-dab walls can both sound hollow. A suitable stud detector may help identify framing and hidden services, although detectors have limitations. Check the wall construction before choosing your fixings. If you're still unsure what's behind the surface, get advice from a suitable installer rather than drilling an exploratory hole.
Some mirrors are designed for adhesive mounting or arrive with their own brackets. For those, the manufacturer's approved fixing method takes priority over anything generic here. The same goes for fixing packs: the rated load printed on the pack applies to the wall type it names, so compare it with the mirror's weight (usually in the product specification) for the wall you actually have. There's no universal screw size, plug type or weight limit. It all varies with the mirror, the wall and the fixing system.
Which of these you use depends on the mounting method and the wall. Few jobs use everything, and the fixing kit supplied with a mirror won't suit every wall.
Tiles are a finish. The mirror's weight is carried by whatever is behind them, usually plasterboard, backer board or masonry, so the first job is to find out which. Use the matching row of the fixings table above to choose the fixing, and allow for the thickness of the tile and adhesive when you work out how long it should be.
Marking and drilling are covered in steps 4 and 5, so these are the points particular to tiles:
No technique guarantees a tile won't crack. Tiles that sound hollow when tapped, and holes planned close to an edge, can be more vulnerable, so check the tile and mirror manufacturers' guidance before drilling in those spots.
Think of this as two separate jobs: mounting the mirror on the wall and connecting its electrical supply. The mounting follows the steps above, with a few extra checks. Any fixed electrical connection or alteration to the bathroom wiring should be handled by a suitably qualified electrician. If the mirror has a plug, follow the manufacturer's instructions and make sure the socket is suitable and permitted for that spot in the bathroom. If you can't tell, ask an electrician before plugging it in.
Start with the manufacturer's installation instructions and the product's electrical specification, including its IP rating. Confirm the mirror is suitable for where it will hang. Bathroom electrical zones, set out in the wiring regulations (BS 7671), are based on where the bath or shower is, and they affect what equipment can go where. IP ratings vary between mirrors, and a rating that suits one position isn't automatically right for another, so check rather than assume. An electrician can confirm what's suitable for your layout.
Hanging the mirror is an ordinary fixing job, though it's worth checking where its cable or connection point sits, because that can affect both the mirror's position and where the supply comes from. A fixed connection, or any addition to or alteration of the bathroom wiring, is electrical work for a suitably qualified electrician. It often makes sense to have them fit the mirror and make the connection in the same visit, so the mirror's position and the supply are settled together. This guide doesn't cover mains wiring, and that's deliberate.
Depending on the model, features such as lighting, demister pads and shaver sockets may have different electrical requirements, so follow the mirror's own installation instructions. If you're still choosing, our [illuminated bathroom mirrors category - link] sets out the options. Check the IP rating and specification against where the mirror will hang.

Learn about shower tray waste types, sizes, traps and flow rates, with practical advice on choosing a compatible replacement.
Yellow stains in a toilet bowl are normally caused by a buildup of hard water limescale and urine scale. Learn how to remove yellow limescale and prevent it returning
A common reason buyers hesitate over steel baths is the fear that the water will go cold quickly, or that the surface will chip if something is dropped on it. In practice, modern enamelled steel behaves differently from acrylic and has some useful advantages, particularly where rigidity and durability matter.

By signing up I agree to receive HeatandPlumb.com emails and to the privacy policy. I can also unsubscribe at any time