
0
£0.00
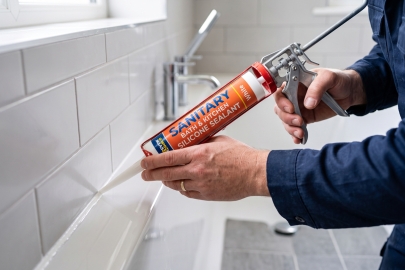
Mouldy or peeling sealant around a bath or shower tray is a common problem that can lead to hidden water damage if ignored. Replacing bathroom silicone is a manageable job, provided the old material is removed entirely and the surfaces are prepared correctly before applying a fresh bead.
Most silicone eventually discolours or loses its adhesion, but premature failure often points to an underlying issue. If a newly applied bead pulls away from the wall within a few months, there is usually too much movement in the sanitaryware. A bath sitting on a flexing timber floor will drop slightly when filled with water, which stretches and eventually tears the seal. If the bath itself is failing rather than just the seal around it, it's worth checking whether the bath can be replaced without removing the surrounding tiles before resealing it again.
Constant standing water in a poorly draining corner will also degrade silicone faster, encouraging stubborn black mould that surface cleaners cannot shift. Replacing the sealant gives you a fresh start, but taking a moment to check for loose brackets, weak floorboards or a poorly supported tray can stop the problem from repeating itself.
Leaving bits of the original bead behind is the main reason new silicone fails to stick. Take a sharp blade or removal tool and carefully cut along both edges of the existing seal. Wear protective gloves in case the tool slips, and always push the blade away from your body. Take care not to gouge acrylic baths or chip ceramic tiles.
Once the bulk of the material is pulled away, use a plastic scraper to lift the remaining flat sections. Old silicone can be stubborn, but patience here pays off. Avoid scraping too hard on plastic surfaces, as deep scratches create micro-abrasions that harbour dirt, encourage mould growth, and reduce the lifespan of the new seal. If the remaining residue refuses to lift, a dedicated chemical silicone remover can soften it for easier scraping.
Silicone adhesion depends entirely on a clean joint. Wipe away any loose dust, soap scum and grease from the tiles and the rim of the sanitaryware. A cloth dampened with white spirit works well for clearing persistent adhesive residue, though the area should be wiped with a clean, dry cloth immediately afterwards.
Allow the joint to dry thoroughly. Applying new sanitary silicone over damp areas traps moisture, preventing the sealant from curing and often causing it to lift away shortly after application. In cold bathrooms where damp lingers, using a hairdryer on a low setting helps to speed up the drying process. Check the gap one final time before moving on, as even a small drop of trapped water can ruin the adhesion.
If sealing around a bath, it is good practice to fill it with water before applying the silicone. The weight of the water pulls the bath down to its lowest point, meaning the new seal cures in the stretched position and is less likely to split when someone gets in.
To apply the silicone, cut the nozzle of the tube at a 45-degree angle. Making the opening around five to eight millimetres wide usually suits a standard bath-to-wall joint. Load the tube into the skeleton gun and hold it at a consistent angle. Keep the gun moving at a steady pace along the joint, applying even pressure to the trigger. Aim for one continuous bead where practical, as stopping and starting leaves uneven lumps that are harder to smooth out later. To keep the lines crisp and protect the surrounding surfaces, apply two strips of low-tack masking tape along the edges of the joint before you start sealing.
Once the silicone is applied, it requires smoothing before it begins to form a skin. A plastic profiling tool pressed gently against the joint sweeps away the excess material and pushes the remaining silicone firmly into the gap, creating a neat bevelled edge.
While running a wet, soapy finger along the joint is a traditional method, washing-up liquid can contaminate the seal and affect long-term adhesion. If you used masking tape, peel it away carefully immediately after tooling, pulling it back on itself at a sharp angle to avoid dragging the wet silicone.
Freshly applied silicone requires time to set before it is exposed to water or steam. Curing times vary significantly between different products, so check the manufacturer's instructions printed on the tube. Most standard sanitary silicones require at least 24 hours to cure fully, though some fast-setting options state they are shower-ready in a few hours. Keeping the bathroom window open or running the extractor fan helps with ventilation, which speeds up the curing process. If you filled the bath before sealing, leave the water in it until the curing period is complete.
A fresh bead of silicone keeps water on the surface, but it cannot fix structural problems. If water is escaping through cracked grout or a damaged tile, resealing shower trays will not stop the leak. Similarly, what looks like a silicone leak is often a leaking waste pipe or a loose trap underneath the bath.
If a bath drops significantly every time it is used due to a poorly supported floor, even the most flexible sanitary silicone will eventually tear. In these scenarios, the floor or framework underneath requires reinforcing to stop the movement before any cosmetic sealing is done.
No. New silicone does not bond well to old silicone. The existing sealant should be completely removed, and the area cleaned and dried before applying a fresh bead.
Yes. Filling the bath with water mimics the weight of a person using it, drawing the tub down to its lowest point. Sealing it in this position prevents the silicone from stretching and tearing later.
Always use a sanitary-grade silicone sealant. These products contain fungicides designed specifically to resist mould and mildew growth in wet, humid environments.
There's no fixed schedule. A well-applied seal in a well-ventilated bathroom can last several years, while one in a poorly ventilated or heavily used bathroom may need attention sooner. Rather than working to a timescale, check the joint periodically for discolouration, gaps, or softness, and replace it once any of these signs appear.

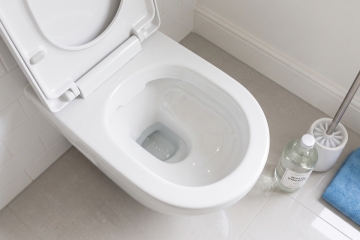
Yellow stains in a toilet bowl are normally caused by a buildup of hard water limescale and urine scale. Learn how to remove yellow limescale and prevent it returning
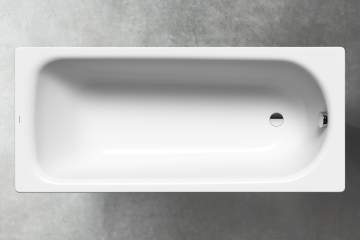
A common reason buyers hesitate over steel baths is the fear that the water will go cold quickly, or that the surface will chip if something is dropped on it. In practice, modern enamelled steel behaves differently from acrylic and has some useful advantages, particularly where rigidity and durability matter.
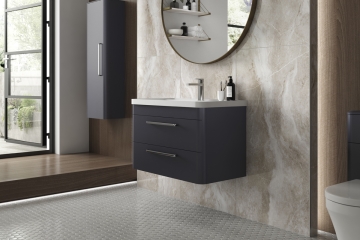
Wall hung vanity units can be installed securely in almost any UK bathroom, provided the underlying wall structure, chosen fixing method and total load are properly assessed. Success relies entirely on understanding what is holding the furniture up, rather than hoping a standard set of wall plugs will hold the weight.

By signing up I agree to receive HeatandPlumb.com emails and to the privacy policy. I can also unsubscribe at any time