
0
£0.00
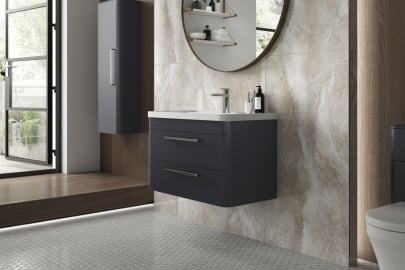
Wall hung vanity units can be installed securely in almost any UK bathroom, provided the underlying wall structure, chosen fixing method and total load are properly assessed. Success relies entirely on understanding what is holding the furniture up, rather than hoping a standard set of wall plugs will hold the weight. This guide assumes you've already decided a wall hung unit is right for your bathroom - if you're still weighing up whether a floating vanity suits your bathroom, see our floating vanity pros and cons guide first.
The physical makeup of the bathroom wall dictates the entire installation approach. Different building eras and construction methods across the UK present varying challenges for load-bearing furniture. Identifying the material behind the plaster is the primary step before selecting any product.
A solid masonry wall in an older property offers a dense, reliable mounting surface, whereas a modern partition wall behaves differently under load. Plasterboard alone has virtually no structural strength, meaning the installation relies entirely on the framework or masonry hidden behind it.
| Wall Type | Typical Construction | Fixing Implication |
|---|---|---|
| Solid masonry | Brick, breeze block or concrete | Straightforward installation using heavy-duty masonry anchors or resin fixings. |
| Stud walls | Timber vertical frames covered with plasterboard | Fixings should engage directly with structural timber or newly installed horizontal supports. |
| Plasterboard / Dry-lined | Hollow cavity walls without immediate timber backing | Cannot support heavy loads on the board alone; requires opening the wall to install timber noggins. |
| Dot-and-dab | Plasterboard stuck to masonry with adhesive | Requires specialist sleeved fixings to bridge the void and anchor into the solid blockwork behind. |
| Lath and plaster | Horizontal timber strips covered in lime plaster (older properties) | Highly fragile. Usually requires stripping back to the studs to install adequate structural timber. |
Checking the manufacturer's specification for the cabinet weight only provides a fraction of the necessary information. The structural calculation involves the total load applied to the wall once the bathroom is in use.
The complete load includes:
A double-drawer MDF cabinet paired with a thick stone resin basin can easily exceed 60kg before a single bottle of shampoo is placed inside. Furthermore, a static weight differs entirely from a dynamic load. A person leaning heavily on the front rim of the basin while using the mirror creates a lever effect. This action forces the bottom edge of the cabinet into the plaster while simultaneously attempting to pull the top brackets out of the wall. The fixings and the wall structure take the brunt of this rotational force.
Where wall stability or the total applied load remains uncertain, asking an appropriately qualified installer to assess the structure prevents expensive damage down the line.
Manufacturers frequently include a set of mounting brackets or a steel hanging rail in the box. These supplied items are generally designed for solid masonry installations. Their inclusion does not automatically make them suitable for every bathroom wall.
Fixing into solid brick or blockwork involves drilling deep holes and inserting high-quality masonry anchors or expanding bolts. The load transfers directly into the dense building material, providing a rigid hold.
Timber stud walls demand a completely different approach. The provided brackets rarely align exactly with the standard 400mm or 600mm spacing of existing vertical timber studs. Relying on hollow-wall anchors straight into the plasterboard to bridge the gap between studs risks the furniture tearing away from the wall under pressure.
In a standard bathroom refurbishment, the standard practice involves removing a section of plasterboard directly behind the proposed vanity location. Thick horizontal timbers, known as noggins, are screwed securely between the vertical studs. This creates a continuous, solid band of wood exactly where the vanity brackets sit. Once the wall is re-boarded and plastered, it provides a highly resilient mounting point.
Many properties built or renovated in recent decades feature dot-and-dab walls, where plasterboard is bonded to blockwork using thick dabs of adhesive. This method leaves a cavity of anywhere from 10mm to 30mm between the back of the plasterboard and the solid masonry.
Tightening a standard screw into this type of wall forces the plasterboard to bow inwards into the cavity, eventually crushing and cracking the plaster. Supporting a floating basin here involves fixings designed specifically to bridge that gap. Products featuring a steel sleeve sit flush against the masonry and pass through the plasterboard. When tightened, the load transfers through the steel sleeve directly into the blockwork, leaving the delicate plasterboard completely uncompressed.
Installing bathroom furniture involves precise mechanical integration rather than just bolting a box to a wall. Floating designs sit entirely clear of the floor, meaning pipework often remains entirely concealed within the carcass or the wall itself.
This layout dictates that hot and cold water supplies, alongside the waste pipe, require exact positioning before the furniture is mounted. Attempting to force rigid pipework around finished drawers usually results in badly cut cabinet backs and compromised storage space.
Modern wall hung vanity units frequently feature a U-shaped cut-out in the top drawer to accommodate the basin waste trap. Even with this cut-out, clearance is tight. A standard bottle trap drops quite low and might foul the drawer mechanism. In many cases, a low-profile furniture trap offers a better fit, directing the waste water backwards towards the wall before dropping down.
Access to isolation valves is another practical consideration. Placing valves on the hot and cold supplies allows maintenance without draining the entire house system. These valves should sit in a location that remains accessible once the drawers are fully assembled, rather than being trapped behind a fixed back panel.
A floating design offers flexibility over the final installation height, breaking away from the fixed dimensions of traditional floor-standing cabinets. However, the finished position should work ergonomically for the people using the bathroom.
The basin type heavily influences the cabinet position. A thick countertop bowl sitting on a worktop raises the washing height considerably compared to an inset ceramic basin. Most installations position the basin rim between 800mm and 900mm from the floor, depending on user height and preference.
The chosen height also interacts with existing bathroom features. A wall-mounted basin mixer tap dictates exactly where the basin sits. Existing wall tiles, shaver sockets, window sills and large mirrors all restrict the available vertical space. Measuring the proposed height and marking the top edge on the wall allows you to stand in front of the space and gauge the washing position before drilling any holes.
Leaving empty space beneath the furniture creates a visually lighter appearance and exposes more flooring, which often makes compact en-suites appear slightly wider. It also provides clearance for a mop or vacuum cleaner, simplifying floor maintenance.
The exact gap beneath the cabinet is determined by subtracting the unit's height and the basin's depth from the desired rim height. A slim, single-drawer cabinet leaves a large expanse of visible wall and floor. A deep, double-drawer model might finish just a few inches above the skirting board. Check the clearance against the swing of the bathroom door or any adjacent shower enclosures. A unit mounted too low might restrict access or look cramped against the floor covering.
Swapping a traditional unit for a floating version rarely qualifies as a straight like-for-like job. The structural demands and the plumbing layout change completely.
An old floor-standing unit transfers almost all its weight directly downwards into the floor joists or concrete slab. The wall behind it usually only holds a few light screws to stop the cabinet tipping forward. Transitioning to a wall hung design shifts that entire load onto the wall structure. A wall that happily supported a pedestal basin might lack the strength to hold a floating double vanity without the addition of timber noggins.
The waste pipe route is another common hurdle. Floor-standing cabinets frequently conceal pipework dropping straight down through the floorboards. Because a floating unit exposes the area beneath it, any vertical waste pipe remains completely visible. Achieving a clean finish usually involves lifting the floorboards to re-route the pipework into the wall cavity, bringing it out horizontally to meet the back of the new cabinet.
Existing skirting boards and wall finishes also affect the changeover. Floor-standing units are often scribed around skirting boards or sit on flooring that does not run all the way to the wall. Removing the old unit exposes unfinished plaster and bare floorboards, requiring patching or tiling before the new floating furniture goes into position.
If an assessment reveals a highly fragile wall structure, such as aging lath and plaster or shallow timber framing unable to accept heavy fixings, alternative approaches still exist.
Some manufacturers produce optional support legs for their floating bathroom furniture ranges. These metal legs fit to the front corners, taking a large percentage of the downward load and transferring it into the floor while maintaining a minimalist aesthetic.
Alternatively, constructing a false wall or a low boxed section using structural timber and fresh plasterboard provides a reliable, flat mounting surface. This approach carries the added advantage of creating a void to neatly hide awkward surface pipework, concealing the hot, cold and waste lines behind the new plaster.

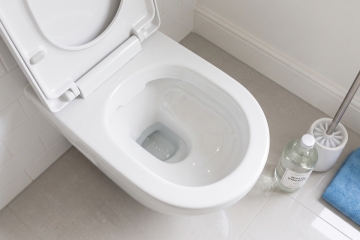
Yellow stains in a toilet bowl are normally caused by a buildup of hard water limescale and urine scale. Learn how to remove yellow limescale and prevent it returning
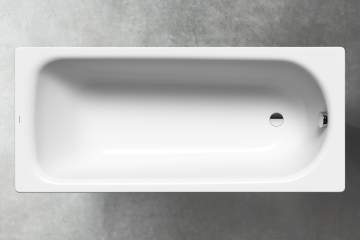
A common reason buyers hesitate over steel baths is the fear that the water will go cold quickly, or that the surface will chip if something is dropped on it. In practice, modern enamelled steel behaves differently from acrylic and has some useful advantages, particularly where rigidity and durability matter.

Mouldy or peeling sealant around a bath or shower tray is a common problem that can lead to hidden water damage if ignored. Replacing bathroom silicone is a manageable job, provided the old material is removed entirely and the surfaces are prepared correctly before applying a fresh bead.

By signing up I agree to receive HeatandPlumb.com emails and to the privacy policy. I can also unsubscribe at any time