
0
£0.00
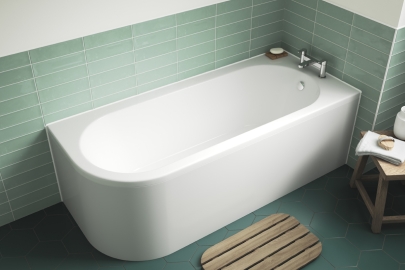
Replacing a bath without disturbing the existing wall tiles is entirely possible, but only if the replacement suits the footprint, tile line and plumbing setup. If the fit is wrong, you can be left with damaged wall surfaces, unsightly gaps or a seal that is difficult to make watertight.
Yes, in certain circumstances. The most likely path to success is a direct like-for-like swap, where the incoming model closely matches the size, shape and height of the old one.
Success depends heavily on how the old bath sits against the wall. In some bathrooms, the tiles finish just above the bath edge with a silicone joint between them. In others, the tiles may overlap the rim, which makes removal much more challenging.
Removing an old bath can disturb the surrounding wall surfaces, so keeping every tile intact is never guaranteed until the fixture is pulled away and the wall condition can be thoroughly inspected.
Replacing a bath without re-tiling works best when the replacement matches the original setup as closely as possible. This means choosing a bath with the same length, width, shape and a nearly identical overall height.
The existing tiles should be sound, firmly fixed to the wall and not trapping the bath edge deeply beneath the bottom row. Plumbing access also matters. If the waste and tap connections can be reached without disturbing tiles, panels or flooring, the job becomes far more straightforward.
The wall behind the bath should also be dry and stable once the old silicone has been removed. If an over-bath screen is fitted, removing the glass carefully before the old one comes out reduces the risk of damaging the screen, tiles or wall.
A straight swap becomes highly problematic when the replacement introduces different dimensions. A model that sits higher or lower than the original can leave ugly gaps, or may not fit neatly beneath the existing tile line.
Re-tiling also becomes more likely if the old tiles overlap the bath edge. Pulling the unit away can easily chip the bottom row or disturb the wall surface behind it.
If the original installer used a waterproof upstand strip or sealing membrane (such as a Classi Seal) behind the tiles, removing the bath cleanly is incredibly difficult. In many cases, the bottom row of tiles must come off because the edge is effectively anchored into the tiled wall.
Wall condition dictates the job as much as bath dimensions. Cracked, loose or blown tiles cannot be resealed reliably. If the old fixture has leaked for a long time, water may have damaged the plasterboard, timber or flooring behind it. In that situation, the wall will need stripping back and repairing before a replacement can be fitted.
Changing the bathroom layout, switching shape or dealing with a bath that has been tightly boxed into an alcove can also turn a simple swap into a major tiling project.
Baths do not all sit at the same height. Adjustable legs help, but they only offer a limited range of movement.
A small height difference between the old and incoming model can leave a visible gap under the bottom row of tiles. A taller design will not slide under the existing tile line without lifting, cutting or disturbing the surrounding finish.
Height also affects the seal. If the bath does not meet the tiles cleanly, the silicone joint is harder to apply neatly and securely. A poorly supported or badly aligned fixture allows movement, which increases the chance of the seal splitting and failing over time.
The relationship between the tiles and the bath rim dictates how easy the replacement will be.
If the wall tiles finish just above the rim with a neat silicone joint, sliding the old unit out is typically more straightforward. If the bottom row of tiles sits over the lip, removing the bath puts direct pressure on the tiles.
Even if the bath comes out cleanly, the old silicone line may leave stubborn staining or reveal damage along the grout or wall surface. A replacement rarely meets the old tiles with absolute precision.
Plastic trims or seal strips can help cover small gaps in some cases, but they should not be used to mask poor fitting or bridge large gaps where water will inevitably pool.
Measuring accurately and checking the existing setup helps avoid ordering one with fitting issues. Before browsing the baths category, check:
Reusing an old panel sometimes works, but it rarely gives the best finish. Older panels can warp over time, and the fixing points may not line up with the replacement's frame.
Height differences between the original and the replacement also cause problems. The old panel may fall short of the floor, sit too tall or need heavy trimming to fit.
Supplying a new panel almost always gives a cleaner finish and saves the fitter from trying to adapt aged, brittle acrylic or swollen MDF. If the original setup has custom timber boxing or a tiled panel, the framework underneath will need adjusting to support the incoming bath properly.
A reliable seal depends on more than a neat bead of silicone. Every scrap of old silicone must be removed fully before the new seal is applied. following proper technique for removing and replacing bathroom silicone.
Installers recommend filling the bath with water, or weighting it down, before sealing the edges. This helps account for the weight of someone using it and reduces the chance of the silicone pulling away when the acrylic moves.
Movement is the primary reason bath seals fail. A neat silicone line will not solve the problem if the bath is poorly supported on its legs or not secured firmly against the wall. A rigid, well-supported bath combined with a high-quality silicone seal reduces the risk of water getting behind the unit and damaging the floor or ceiling below.
Confident DIYers can easily handle cosmetic parts of a bathroom update, but replacing a bath involves far more than lifting one out and dropping another in.
The job involves disconnecting and reconnecting tap supplies, aligning the waste, supporting the framework correctly and sealing it effectively against the wall. Mistakes lead to hidden leaks that only become obvious when staining appears on the ceiling below.
A professional fitter is highly recommended if the aim is to keep the existing tiles intact. They are better placed to judge how the fixture is secured, how much movement to expect and where damage to surrounding tiles or walls is most likely to occur.
If the existing tiles are sound, modern and firmly attached to a dry wall, a careful replacement can save money and reduce household disruption.
However, if the tiles are damaged, loose, dated or badly aligned with the updated bath's height, re-tiling gives a far better long-term result. Trying to patch only the bottom row almost always looks obvious, especially if the original tiles are no longer available.
A bath replacement is often the moment when hidden issues appear. Old silicone, poor support, water damage or weak tiles can all change the scope of the job once the original bath has been removed.
Swapping a bathtub without disturbing the tiles depends on careful planning. Measure the space meticulously, choose the closest matching straight baths or shaped tubs available, and check the tile line before ordering.
Allow for a new bath panel, a suitable waste and a fresh seal. Check whether the existing taps can be reused or whether a different hole position means new bath taps are needed.
If you are unsure about tile overlap, height differences or plumbing access, ask a professional fitter to inspect the bathroom before buying the replacement. A quick survey before ordering helps avoid a simple bath swap turning into an unexpected re-tiling job.
If you've discovered that a simple swap isn't possible and you need to start your renovation from scratch, check out our Top Tips for Installing a Bath.

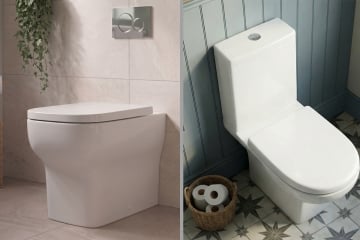
Learn how cable and pneumatic toilet flush buttons work, how to identify your mechanism and what to check before buying a replacement.
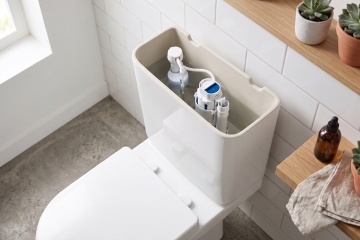
If your toilet will not flush properly, the cause is usually either inside the cistern, around the flush mechanism or further along the waste pipe. The key is to work out whether the flush is weak, not working at all, or backing up into the pan.

A weak shower is often caused by a mismatched shower head, built-up limescale, restrictive pipework, a poorly specified water system or an incompatible pump. Pinpointing the root of the problem saves money and helps avoid buying replacement hardware that was never going to solve the underlying issue.

By signing up I agree to receive HeatandPlumb.com emails and to the privacy policy. I can also unsubscribe at any time