
0
£0.00
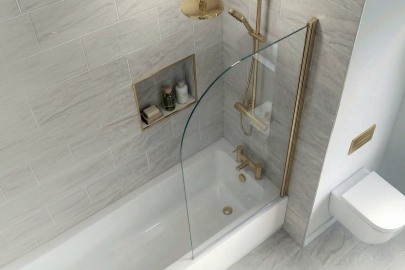
A bath screen needs to fit the bath edge, wall condition, and room layout, rather than just matching a single width measurement found on a product listing. Getting these dimensions right helps reduce splashing and makes sure the screen can open, close and sit correctly. If you are upgrading your entire bathroom and haven't selected your bath yet, our Bath Buyers Guide is the best place to start before you begin measuring up.
Before looking at bath screens, taking a few specific measurements will narrow down your options quickly. The main dimensions include the available width along the bath edge and the height from the bath rim to the ceiling or top of the tiling.
Alongside these, checking the available swing space around the bath helps decide between a fixed or moving screen. The distance from your tap and shower fittings, the profile of the bath rim itself, and the condition of the wall where the channel fixes are equally relevant to getting a good fit. In older UK properties, walls are rarely perfectly straight, making accurate measuring at multiple heights a useful approach.
Measuring the width involves checking the distance from the tiled wall along the top edge of the bath. Take this measurement exactly where the screen will sit, keeping in mind that standard setups cover only the immediate showering zone. Measuring the whole bath is usually only helpful if you are considering a very long fixed panel or a full enclosure.
The width you choose should reflect the shower position, spray pattern and available space around the bath. Large rainfall showers can spread water over a wider area than a small handset, so they may need a wider screen for better splash control. A narrow panel might keep a small space feeling open, but it can struggle to contain the spray from a high-flow valve.
The profile of your bath directly affects how well a screen can keep water contained. A standard screen relies on a reasonably flat, stable rim where the bottom seal can sit flush against the surface. Some curved, rolled or heavily shaped bath rims can make it difficult for standard straight screens to maintain a solid seal.
If you have a specific setup, such as a P-shaped or L-shaped model from a shower baths collection, these shapes usually require a matching curved or angled screen designed specifically for that profile. Fitting a straight piece of glass over a sweeping curved rim can leave gaps where water is more likely to escape, so matching the screen style to the bath shape is usually the better option.
Bath screen height is generally measured straight upward from the top of the bath rim, rather than from the floor. Checking the available vertical space is a good idea, particularly in loft conversions where ceiling slopes or low lintels dictate the maximum height. Take note of where the wall tiles end, as well as any high window reveals, shelving, or wall cabinets that might get in the way of the glass.
Taller users and high-mounted shower heads often benefit from a taller screen to contain the spray. A taller screen helps stop water splashing over the top, provided the wall is suitable for the screen and the fixing points are sound.
Different screen mechanisms operate differently and require varying amounts of clearance.
| Screen Type | Movement | Space Requirement |
|---|---|---|
| Fixed | None | Minimal; stays entirely on the bath rim. |
| Hinged | Swings inward or outward | Requires a clear arc away from basins and toilets. |
| Folding | Concertinas flat | Needs clear wall space to fold back completely. |
| Sliding | Slides within a frame | Excellent for tight spaces; no outward swing required. |
A simple fixed screen stays permanently in place, meaning you only check the footprint on the bath rim. A hinged screen swings outward or inward, so checking the arc of movement against nearby basins, toilets, or towel rails prevents access issues later. A folding screen requires room to concertina back against the wall, while a sliding screen often suits compact en-suites where outward swing space is limited.
Take care to measure the distance from the bath edge to any protruding obstacles, including deep window boards or bulky vanity units. A hinged door with a large metal handle can easily strike a nearby ceramic basin if the swing space is misjudged.
The location of your bath taps, shower valves, and riser rails strongly influences which screen style will work best. Having bath taps installed at the same end as the screen can make reaching them awkward. A large fixed panel creates a physical barrier when leaning in to run a bath or test the water temperature.
If the shower spray points directly towards the open end of the bath, a wider screen or an additional deflector panel can help catch the water. A centrally positioned shower valve on the long wall might suit a folding layout better, allowing you to fold the glass away to control the water without reaching around a wet pane of glass.
The wall taking the weight of the glass channel should be solid enough to support the installation. Wall tiles should be sound, as drilling into loose or hollow tiles often causes cracking. Older properties frequently feature uneven walls, which affects how plumb the screen will sit and how well the bottom seal meets the bath.
Fortunately, most bath screens feature a wall channel with an adjustment range to compensate for walls that are slightly out of true. Checking the specific adjustment range on the product details gives a better indication of compatibility than simply guessing. A screen offering a generous adjustment range provides far more installation flexibility than a rigid frame with zero tolerance.
| Measurement / Check | What to measure | Why it matters |
|---|---|---|
| Bath rim width | Distance from wall along the flat bath edge. | Determines maximum screen width while keeping a good bottom seal. |
| Screen height | Distance from bath rim to ceiling or top of tiles. | Confirms glass will clear ceiling slopes and provides enough splash protection. |
| Screen width | The span of the glass panel itself. | Dictates how much of the showering zone is protected from water spray. |
| Wall straightness | How vertical and flat the tiled wall is. | Helps choose a product with the right adjustment range for out-of-true walls. |
| Bath shape | Profile of the rim (straight, curved, P, L-shape). | Ensures the bottom seal matches the bath shape to prevent leaks. |
| Shower position | Location of shower head and direction of spray. | Highlights whether a wider panel is required to catch angled water spray. |
| Tap position | Location of the bath filler or taps. | Confirms you can easily reach taps without the screen blocking access. |
| Swing clearance | Arc of movement for hinged/folding doors. | Prevents a moving screen from hitting a toilet, basin, or towel rail. |
| Nearby furniture | Proximity of vanity units, shelves, windows. | Ensures screen can open/close without striking hard objects. |
| Tile/Wall state | Height of tiling and soundness of surface. | Confirms the wall bracket can be securely fixed into solid material. |
The right size depends entirely on the bath model, the shower position, and the wider room layout. Many bath screens cover only the main showering zone rather than enclosing the entire space. Wider screens offer better splash protection but often make stepping into the bath slightly harder, particularly in narrow bathrooms where floor space is limited.
Smaller screens suit compact bathrooms and leave plenty of access space, but naturally offer less coverage against heavy rainfall showers. The best choice is simply the screen that fits the bath securely, controls the spray effectively, and leaves enough space for everyday use. Checking the measurements alongside any planned access requirements around your bath panels often helps visualise how the entire side of the bath will function once the screen is fitted.
Taking a few minutes to accurately measure the bath rim, available height, and swing space helps prevent awkward installation issues. Check the tap locations, the shower spray direction, and any nearby obstacles before deciding on a style. Choose the screen mechanism that works around your specific room layout, and check the product dimensions and adjustment ranges on the listing.
If the wall is particularly uneven, the bath shape is unusual, or the layout is tight, ask your installer for advice to confirm the screen will fit properly.

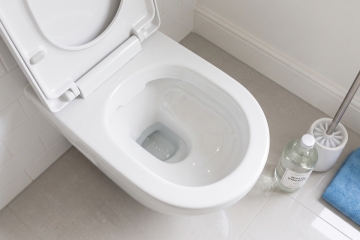
Yellow stains in a toilet bowl are normally caused by a buildup of hard water limescale and urine scale. Learn how to remove yellow limescale and prevent it returning
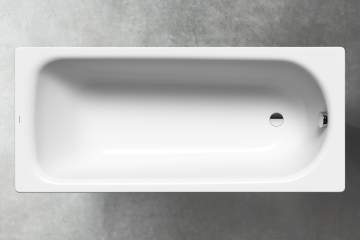
A common reason buyers hesitate over steel baths is the fear that the water will go cold quickly, or that the surface will chip if something is dropped on it. In practice, modern enamelled steel behaves differently from acrylic and has some useful advantages, particularly where rigidity and durability matter.
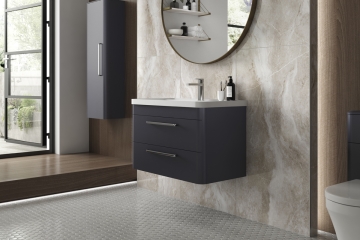
Wall hung vanity units can be installed securely in almost any UK bathroom, provided the underlying wall structure, chosen fixing method and total load are properly assessed. Success relies entirely on understanding what is holding the furniture up, rather than hoping a standard set of wall plugs will hold the weight.

By signing up I agree to receive HeatandPlumb.com emails and to the privacy policy. I can also unsubscribe at any time